Before the re-making of a Twisted Metal video, I had an OC car in plan, possibly used for some TM-related skit I had in mind, but had to scrap because of budgetary reasons. Since I was dormant on making any art besides my Cyberpunk Sam(V)rai, I fire up good ol' Blender and start modelling my Twisted creation known as Jackrabbit.
Jackrabbit is designed as a quick & nimble hatchback, based off a Volkwagen Golf Mk.1 (aka: The Rabbit), It's modestly armored, packed with a pair of M60-looking MG's, the back panels have missile doors, the trunk opens from the bottom to fire a gas can, and the front grill opens to fire a ricochet. It's special weapon is an unusual one, because it's a harpoon gun. The harpoon pierces to an enemy (or any surface, and Jackrabbit reels itself in such incredible speed, likely ramming the enemy as strong as Darkside. The downside is that Jackrabbit is one of the weaker vehicles, mildly stronger than Twister in vitality.
Anyways, enough fanfiction, let's begin the process.
Start of an early model (May 28th, 2024)
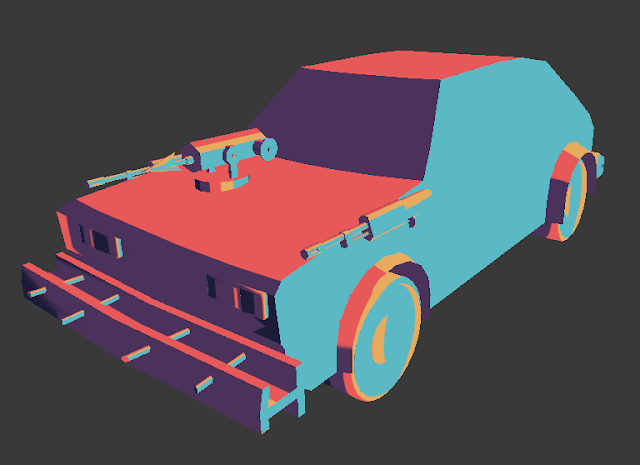
I used a blueprint of the Mk.1 Golf as the starting point and implemented the early shapes from the wheelwells, machine guns, harpoon, and the front bumper being an I-beam held with rebar. The wheels themselves have different sizes on the front & back, trying to give off a hot rod feel.
Added headlights and a temporary matcap
The matcap is temporary because I think it looked cool. Well, it's not a proper matcap, it's just a palette.
Some more refinements but without the matcap. Added a reel on the harpoon, and added a hole on the MG muzzle brake.
Adding a background (May 29th)
This next step I added a backdrop to get some atmosphere. The background textures are ripped from Twisted Metal: Harbor City (the game I'm making a video of), which I have to modify because all of them are translucent. Also, here's a look at the back of Jackrabbit.
More additions.
Next step is to add some details, like the hinges for the missile doors, door handles side mirrors, an exhaust pipe, and most importantly: A rabbit hood ornament (which in this part of the process had a ridiculously high poly count for something that small). I bent the 2 front rebars so the I-beam could not only hold together, but the middle rebars could also be used like a spike.
A fleshed out background (June 1st)
I started to flesh out the background some more by adding an ungodly amount of lamps. I added some lit store interiors, extra billboards, and the worst part is the trees. I suck at trees, but they're mostly obscured by the plants. Earlier in the process, the transparent mesh in the render has a full shadow, until I found out that you have to click "receive transparent" on each & every material just to make the transparent mesh shadows to work properly. That was it for the background for now, and it's time to focus on the car.
Front & Back with custom matcap.
Some minor refinements on the model, but with a custom temporary matcap because I feel like it. Added 2 more materials to represent the windows and mirrors. The missile doors used the window material just to show you where they are.
Updated model again (June 3rd)
Another updated piece, but this time I added a window bar (aka: The Cage), gas cap, reflectors, materials for the headlights & taillights, remodeled machine guns, and replaced the rear bumper with another I-beam. Meanwhile, I also modelled the interior.
The texture plans. It was planned to have 3 texture pages, but in the end it's a whopping 9. 2 for interiors, 2 for exteriors, 2 for the wheels, 1 for harpoon, machine guns, and the windows.
These are just the rough plans for what I want to add for the Rabbit's appearance. Here's a look at all the sides of the car before I started the process.
First textures (June 4th)
I started the tedious process of the texturing, and the armor looked rough, I had to admit it. I just started copy-pasting these materials wholesale. The pink outlines represents what part of the car is collided with the mesh and what details I should add.
Color choices (June 5th)
During texturing, one thing I can't make up my mind on is the color. The first attempt is a tan color, but I decided to say "fuck it," and made several colors and show it to some friends on some Discord servers I'm in. Only two candidates are chosen, which is Wasp Yellow and Clay Orange, citing that these would make the armor plates pop out a lot more.
And so I chose orange (June 6th)
I picked orange because yellow is too garish. The "27" on the hood is reused from a custom sticker for my RC Beetle, a couple months back. Added a single stripe because it looked cool. Oh btw I added the texture for the bumpers, machine guns, exhaust & cage, which all shared in one page.
Bumpmaps and more textureworks (June 7th).
I added 2 more textures for the wheels (1 for rims, 1 for treads), and an early bumpmap texture which later went unused.
Using textures as lighting (June 9th/June 13th)
So it's possible to make some lighting without using lamps in Blender, but that is not ideal because it's not very effective. It looked cool though.
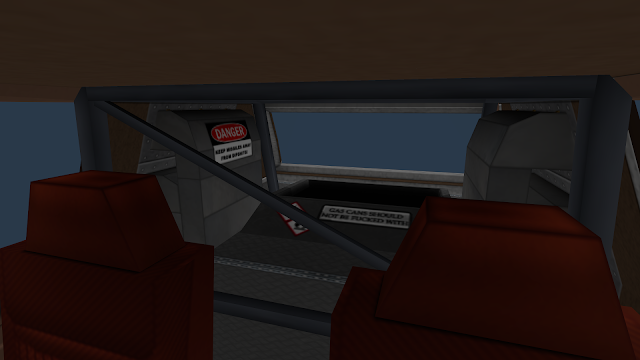
I modelled the interiors (June 14th)
This one took me FOREVER to get this done. Lots of copy-pasting + filters just to get it all in. Quite excessive to add a lot of detail for a car I could mod into some game and barely see the inside. I forgot to mention the roll cage in the car, and the weird void that partially cuts the cage is the rearview mirror.
The Fully rendered car (June 17th)
The last things I did was add mud flaps, the chassis + window textures, decals for the exterior, and replace the circle 27 with a more traditional Rally banner. I was thinking about adding a charm for the car's mirror but decided to opt out on that.
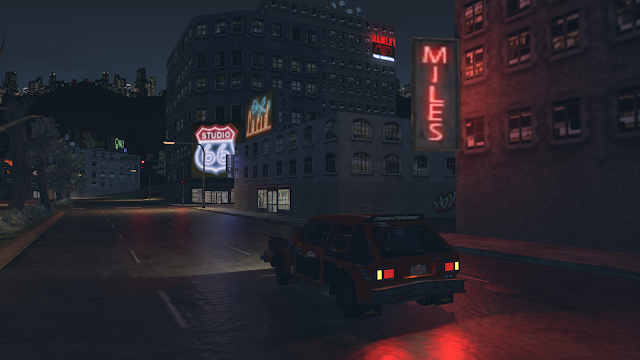
The Main Render
This is the final render for Jackrabbit. I updated the background, and the interior for "Studio 66" was updated because it doesn't looked right lol. The end result looks very nice, IMO. Maybe I should've updated the bumpmap, but I just leave it as is.


Comments
Post a Comment